ACA Calendar Record ID
Code
A unique code for the ACA calendar.
Description
A description of the ACA calendar.
Calendar tab
Detail table
Type
The type of calendar period defined on the selected row. Valid options are:
- Initial. An initial calendar period is used when processing new hires.
- Standard. A standard calendar period is used when processing on-going employees.
Variable Time Hiring Period
Use these columns to define the range of hiring dates for variable hours employees who will be processed using the calendar period.
Begin
This cell is disabled for standard calendar periods.
If this row represents an initial calendar period, enter the earliest hiring date for variable hours employees to which the measurement period, administration period, and stability period defined on this row apply.
End
The last hiring date for variable hours employees to which the measurement period, administration period, and stability period defined on this row apply.
Measurement Period
Use these columns to select the measurement basis and to define the range of measurement dates for variable hours employees who will be processed using the calendar period.
Basis
The type of benchmark to use to determine a variable hours employee's ACA full-time or part-time status. Valid options are:
- Monthly. Employees with more than 130 hours per month are deemed full-time; with less, part-time.
- Weekly. Employees with more than 30 hours per week are deemed full-time; with less, part-time.
Begin
The date of the first day of the measurement period for variable hours employees hired during the corresponding variable time hiring period.
End
The date of the last day of the measurement period for variable hours employees hired during the corresponding variable time hiring period.
Administration Period
For initial calendar periods, this column shows the range of dates for the administration period of variable hours employees who will be processed using the calendar period.
Begin
This column is blank for standard calendar periods.
For initial calendar periods, this column displays the date of the first day of the administration period. This date is the day after the last day of the measurement period.
End
This column is blank for standard calendar periods.
For initial calendar periods, this column displays the date of the last day of the administration period. This date is the day before the first day of the stability period.
Stability Period
Use these columns to define the stability period associated with the calendar period.
Begin
The date of the first day of the stability period associated with the calendar period.
End
The date of the last day of the stability period associated with the calendar period.
Full Time Hiring Period
Use these columns to define the range of hiring dates for full-time employees who will be processed using the calendar period.
Begin
This column is disabled for standard calendar periods.
If this row represents an initial calendar period, this is the earliest hiring date for full-time employees to which the stability period defined on this row applies.
End
The latest hiring date for full-time employees to which the stability period defined on this row applies.
Description
A description of the calendar period. Use this field to track which calendar periods have been processed by Create ACA Records so that you don't process the same period multiple times.
Change Logs tab
This tab is visible if the user has "Change Logs" access to the associated data folder resource.
The Change Logs pane shows the Change Logs HD view filtered to show all change logs for the selected entity record.
Double-click a row in the pane to drill down to its record in the Change Log window.
Other tab
Memo tab
To include additional information about this record not collected elsewhere, enter it in this text box. This area supports common keyboard shortcuts such as Ctrl+C to copy and Ctrl+V to paste.
Timestamps tab
This tab shows the user who created this record and the date and time of creation as well as the user, date, and time of the latest modification to the record.
Developer tab
This tab is visible only when developer features are enabled.
Automation subtab
This subtab shows field names and values for the current data record. Use the information in the subtab to assist when creating automation objects such as bots and import files. The field names and field values can be copied from the text box and pasted directly into your code or application. To copy content from the text box, highlight the content to copy and press Ctrl+C or right-click your selection and select Copy from the context menu.
Export (XML | JSON) subtab
This subtab shows the XML syntax for exporting the selected data record. The syntax can be copied from the text box as an exemplar for creating your own automation objects for bots, import files, ActivWebAPI, etc. To copy content from the text box, highlight the content to copy and press Ctrl+C or right-click your selection and select Copy from the context menu.
Import (XML | JSON) subtab
This subtab allows you to select a file for import and shows the XML syntax for importing data records. Use the subtab to explore the XML syntax for importing data records. In particular, you can investigate the syntax which results when using Data.Import and ActivWebAPI data POST and DELETE routes.
Change Log (XML | JSON) subtab
This subtab is visible only when the Enable Change Logs option is marked in System Options or Company Options (depending on whether the feature applies at the system or the company level). This is the default setting when developer features are enabled.
This subtab allows you to investigate changes to the current data record. The syntax can be copied for use in bots, dashboards, ActivWebAPI, and other automation. To copy content from the text box, highlight the content to copy and press Ctrl+C or right-click your selection and select Copy from the context menu.
Select Statement (SQL) subtab
This subtab allows you to investigate the SQL select statement used to retrieve the current data record. The syntax can be copied as an exemplar for data sources and other automation. To copy content from the text box, highlight the content to copy and press Ctrl+C or right-click your selection and select Copy from the context menu.

 . The New ACA Calendar window opens.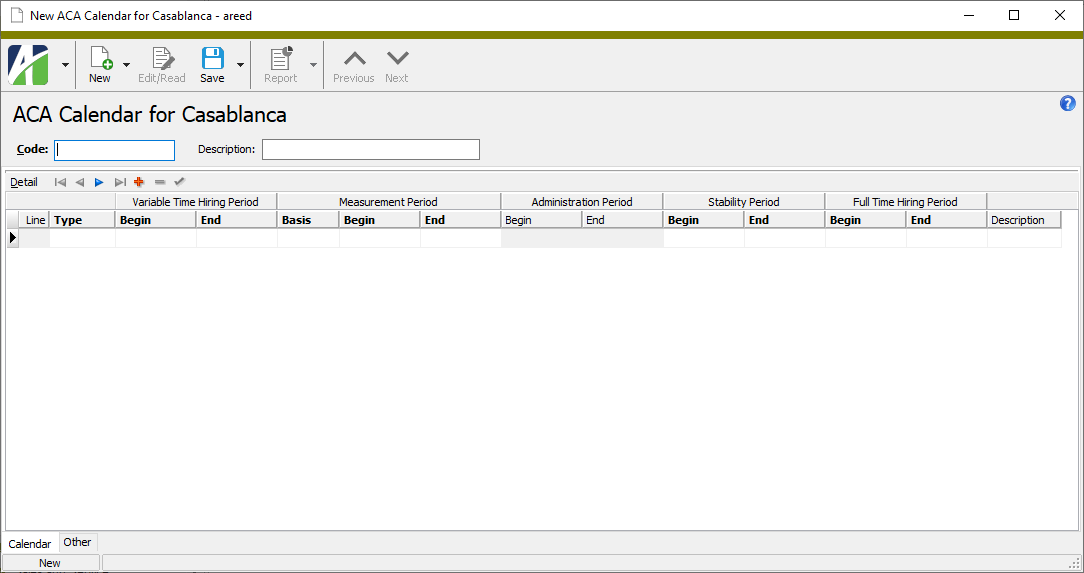


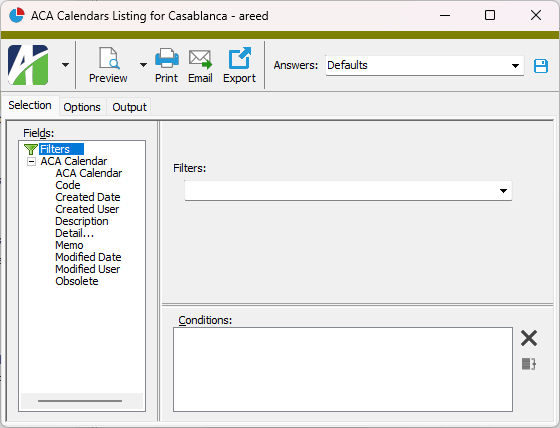
 and select ACA Calendars Listing from the drop-down menu.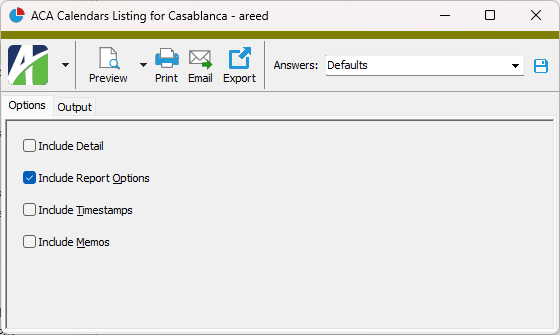
 - Provides access to two preview options.
 - Opens the Print dialog so that you can select and configure a printer and then print a paper copy of the report.
 - Opens the
  - Opens a drop-down menu with two export options: